
You'll love this!
Last week we released some significant email upgrades you are going to love. Be sure to forward this email to everyone else on staff who uses email to get the word out. You'll see quick access to these under the Communicate button. This email gives you a short overview of these features followed by the details.
______________________________________________________
Overview:
- Delivery stats. Opens, bad email addresses, etc..
- Add attachments to CT email.
- Create and save email templates.
- Schedule when emails are sent.
- Send a preview/test email.
- Customize lists with granular unsubscribe.
- Editor upgrades.
- Images: auto upload pasted images, thumb nail preview of images, inline editing.
- Advance pasting from MS Word.
Details:
1. Delivery stats. (Released in April) Click Communicate then Email History. You will see your reputation, # of emails sent and overall deliverability rate. Put an individual email address or a subject line in the search box and a date range to see delivered, failed, and opened emails. Rejected emails include: bad addresses (hard-bounce), bad connection and system will re-try (soft-bounce), rejected as spam. The system will discontinue sending emails to anyone who marks Churchteams as spam. You will need to contact support to reverse this.
2. Attachments. The new email editor has a blue "Attach File" button listed below the text box. Use this to attach PDF, microsoft office documents (word, excel, powerpoint), CSV, RTF, and TXT. Other types are not allowed for security reasons. Automatic virus scans are done on the files before sending.
3. Email Templates. Under the email subject line is a drop down list of saved templates. Two template formats are provided for you to build on and save, others can be found using the link to free templates. When you've created a template you like, click the "Save as Template" button for future use. There is an "Email Templates" link under the communicate button for quick access to review, create and edit templates.

4. Schedule sending emails. Want your email to go out at a future date/time? Schedule that by using the schedule feature found just above the "Attach File" button.

5. Send a preview/test email. Use this blue button located just above the green "Send" button to send yourself a preview of the email to make sure it looks correct. The "To" field defaults to the email address in the "From" field but can be edited on the popup that appears after you click to preview.
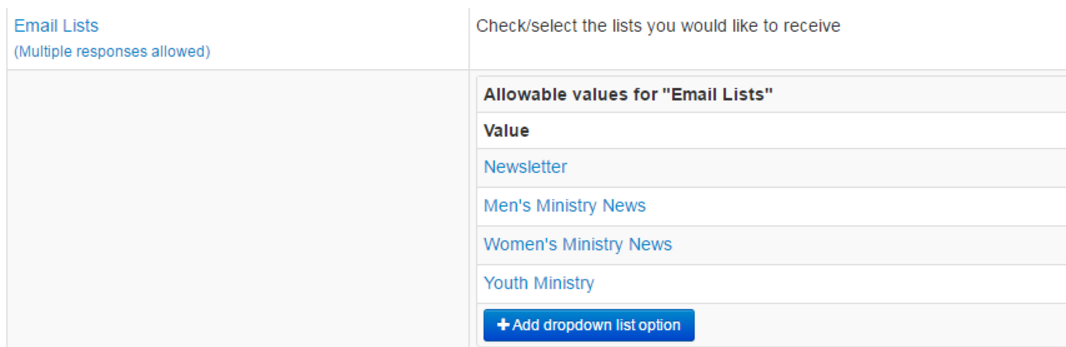
These lists conveniently show up as options any time you are sending an email using the reporting system:
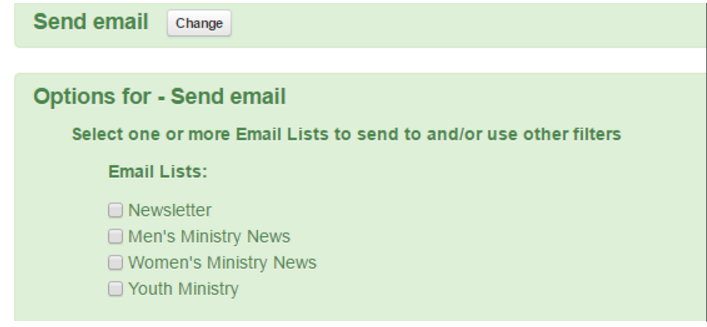
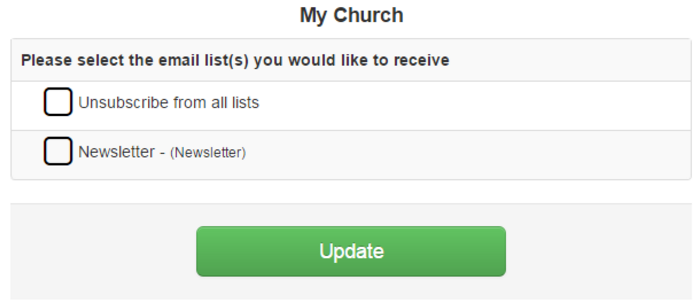
If someone clicks the "Unsubscribe" link on your email (whether you filtered by the "Email lists" attribute or not), they will be taken to a page to choose which list(s) from which they wish to unsubscribe. Choosing to "Unsubscribe from all lists" is the same response as the old universal unsubscribe.
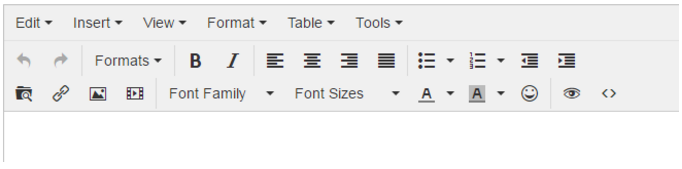
7. Editor upgrades. The new email editor has an updated user interface and easier options for inserting images directly (without using a link reference). The new editor is available on the primary email page but also other areas of the system where HTML is composed such as the section for customizing and designing your Contribution email receipt and a number of other locations in the application.
8. Images. You can now directly paste an image from the clipboard into the email and the system will auto upload it and enter the correct reference/url for the image. Previously you had to upload the image then copy the reference/url and paste into the email.
Image upload with thumb nail preview of all images. When you click the image icon on the email editor a box appears allowing you to enter a URL for an image or, click the "Source" icon to go to the image management box. You can choose any image already uploaded from the thumbnail list or quickly upload a new one. Sorting and searching are also a feature in this dialog box.

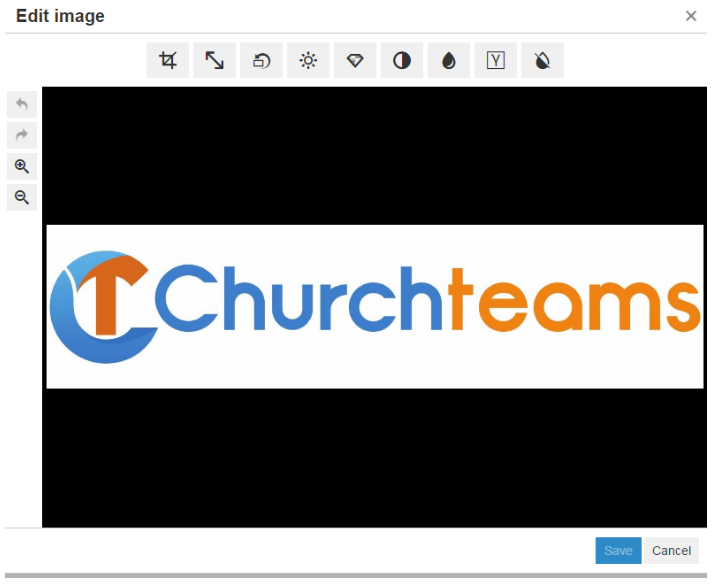
In editor image editing. When you choose an image, you automatically have in-editor editing options to rotate, crop, re-size, change color/brightness, and more. Both the newly edited image and the original one are automatically saved.
9. Advanced pasting from a Microsoft Word. If you create your email in MS Word, highlight the section you want to use, then use keyboard shortcuts to copy (control c) and then paste (control v) the image directly into the email editor. It will be converted with most formatting intact (although not exactly due to formatting limitations with email in general). It will also include images in the word document if they are pasted in.
Final note / limitation:
We did not include a mail merge/personalization feature in this release. This would use variables such as in the email to add in names or other personal/custom information. We plan on rolling that into a related feature that will allow you to create then automate sending of a series of emails based on whatever criteria you choose. No date has been set for working on or releasing this yet.


